Arduino I2C OLED Display - Temperature and Humidity Display (SSD1306)
In this tutorial I will demonstrate how to print temperature and humidity readings onto a 0.96 inch I2C OLED display. The device is DIYMall's inexpensive, high resolution (128x64 pixels), yellow and blue organic LED display that is designed for use with the Arduino platform. Together with a DHT22 temperature sensor, the tiny OLED screen will display real-time humidity and temperature data using an Adafruit library and an Arduino Uno board. This project can be expanded upon to print data from a wide array of sensors, and even grab data from the internet to print values for a smart and interactive display.
Downloading and Testing The Mini LCD Display Library
The process for using the library associate with the OLED display is somewhat convoluted, so I have simplified the steps and included them below:
Download the I2C library at the recommended link: HERE
Unzip the contents to a local folder
Navigate as follows: 'IIC_OLED -> 0.96Inch'
Copy 'Adafruit_SSD1306' and 'Adafruit_GFX'
Paste both folders in your 'Arduino -> libraries' folder
Navigate from the original folder again as follows: 'IIC_OLED -> 0.96Inch -> examples'
Copy 'ssd1306_128x64_i2c' and paste into your Arduino sketches folder
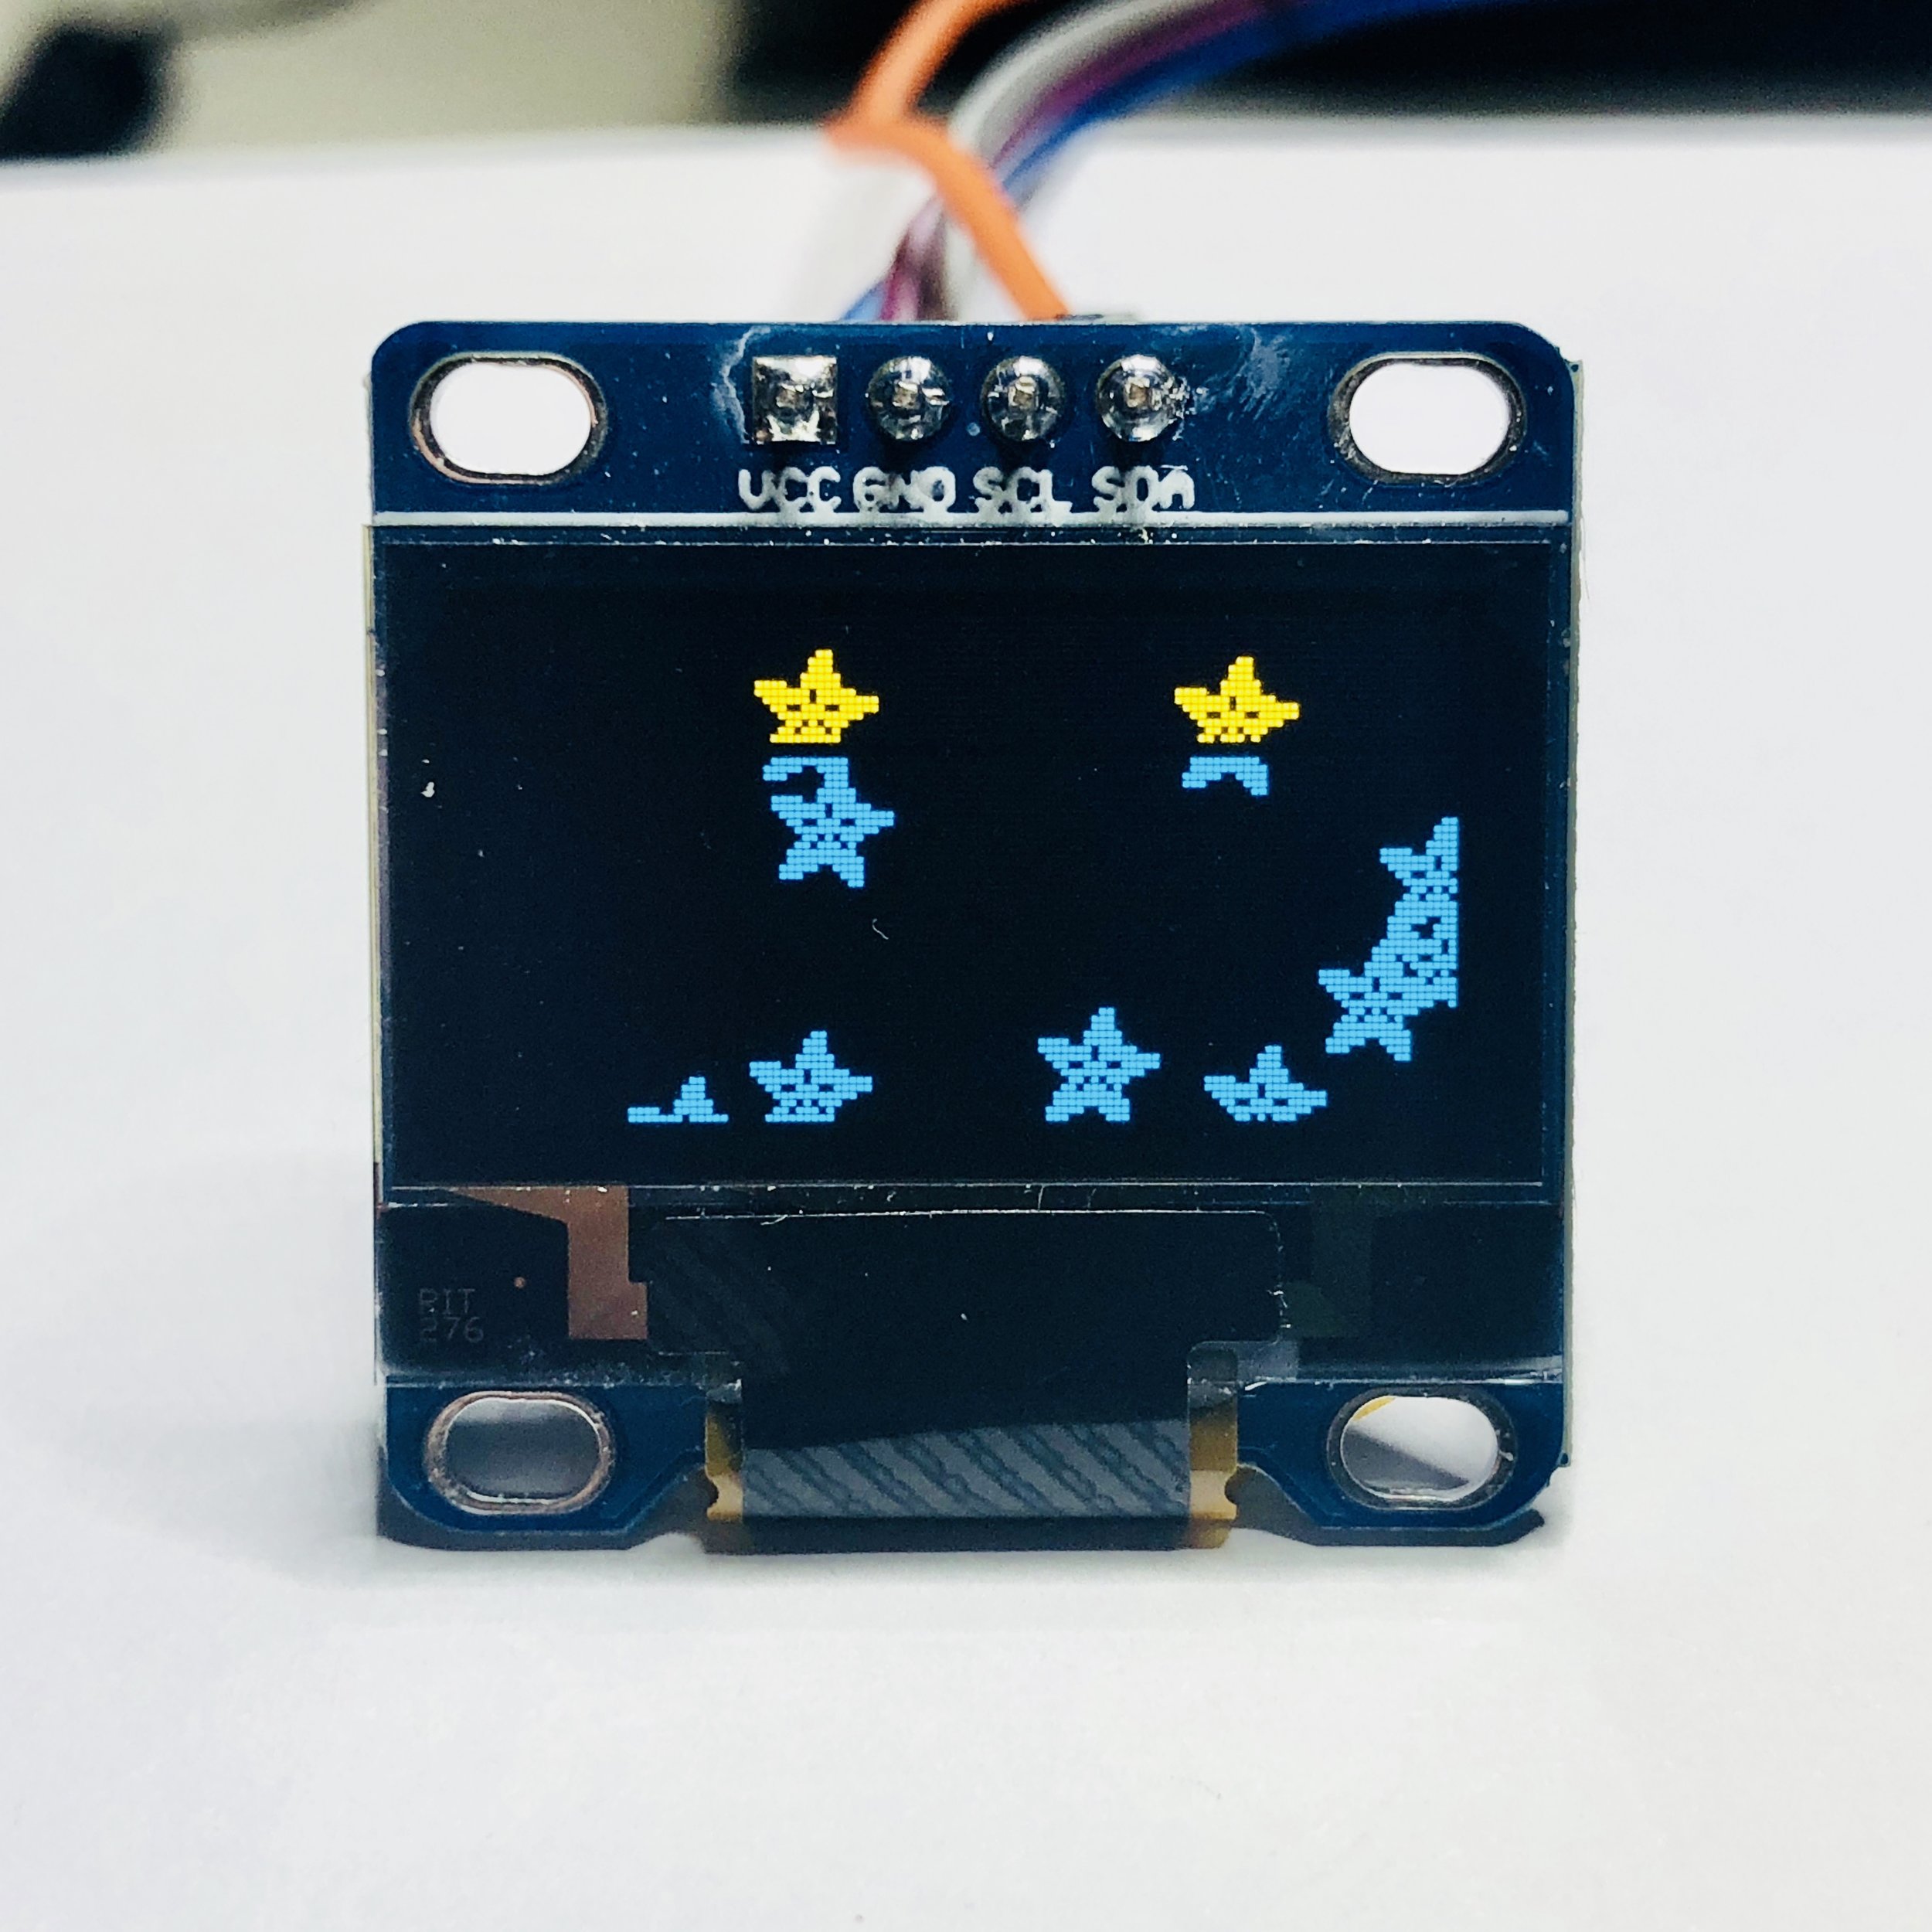
Now open the Arduino IDE and go to your 'Sketchbook' tab and you should see the 'ssd1306_128x64_i2c' - this means you are ready to test the example script! After uploading the sketch, your display should produce a series of objects and animations that look like similar to the video below:
Parts List for Displaying DHT22 Data Using The Mini OLED Display

Arduino Wiring and Code
The following Arduino code utilizes the library provided by DIYMall from the Amazon link above. The library uses a specific SSD1306 library (for the 128x64 pixel display) and an Adafruit display library. I will also be using the DHT22 library which can be easily downloaded from the Arduino IDE library manager.
The OLED display is wired to the Arduino through its I2c ports on analog pins A4/A5. The DHT22 uses digital pin 2 to communicate using the library described above.
| Arduino | Display/Sensor Pins |
|---|---|
| 5V | 1 (DHT-22) |
| D2 | 2 (DHT-22) |
| GND | 4 (DHT-22) |
| 3.3V | VCC (Display) |
| GND | GND (Display) |
| A4 | SDA (Display) |
| A5 | SCL (Display) |
/*********************************************************************
This is an example for our Monochrome OLEDs based on SSD1306 drivers

  Pick one up today in the adafruit shop!
  ------> http://www.adafruit.com/category/63_98

This example is for a 128x64 size display using I2C to communicate
3 pins are required to interface (2 I2C and one reset)

Adafruit invests time and resources providing this open source code,
please support Adafruit and open-source hardware by purchasing
products from Adafruit!

Written by Limor Fried/Ladyada  for Adafruit Industries.
BSD license, check license.txt for more information
All text above, and the splash screen must be included in any redistribution
*********************************************************************/

#include <Wire.h>
// two libraries inserted into the 'libraries' folder
#include <Adafruit_GFX.h>
#include <Adafruit_SSD1306.h>
// dht library
#include "DHT.h"

#define DHTPIN 2     // what digital pin we're connected to
#define OLED_RESET 4
Adafruit_SSD1306 display(OLED_RESET);

#define DHTTYPE DHT22

#if (SSD1306_LCDHEIGHT != 64)
#error("Height incorrect, please fix Adafruit_SSD1306.h!");
#endif

DHT dht(DHTPIN, DHTTYPE);

void setup()   {
  display.begin(SSD1306_SWITCHCAPVCC, 0x3C);  // initialize with the I2C addr 0x3D (for the 128x64)
  display.display(); // show splashscreen
  delay(2000);
  display.clearDisplay();   // clears the screen and buffer

  dht.begin();
  delay(2000);
}


void loop() {
  float h = dht.readHumidity();
  // Read temperature as Celsius (the default)
  float t = dht.readTemperature();
  // Read temperature as Fahrenheit (isFahrenheit = true)
  float f = dht.readTemperature(true);

  // Check if any reads failed.
  if (isnan(h) || isnan(t) || isnan(f)) {
    delay(2000);
  } else{
    // routine for converting temp/hum floats to char arrays
    char temp_buff[5]; char hum_buff[5];
    char temp_disp_buff[11] = "Tmp:";
    char hum_disp_buff[11] = "Hum:";

    // appending temp/hum to buffers
    dtostrf(t,2,1,temp_buff);
    strcat(temp_disp_buff,temp_buff);
    dtostrf(h,2,1,hum_buff);
    strcat(hum_disp_buff,hum_buff);

    // routine for displaying text for temp/hum readout
    display.clearDisplay();
    display.setTextSize(2);
    display.setTextColor(WHITE);
    display.setCursor(0,0);
    display.println(temp_disp_buff);
    display.println(hum_disp_buff);
    display.display();
    delay(2000);
  }
}
Conclusion
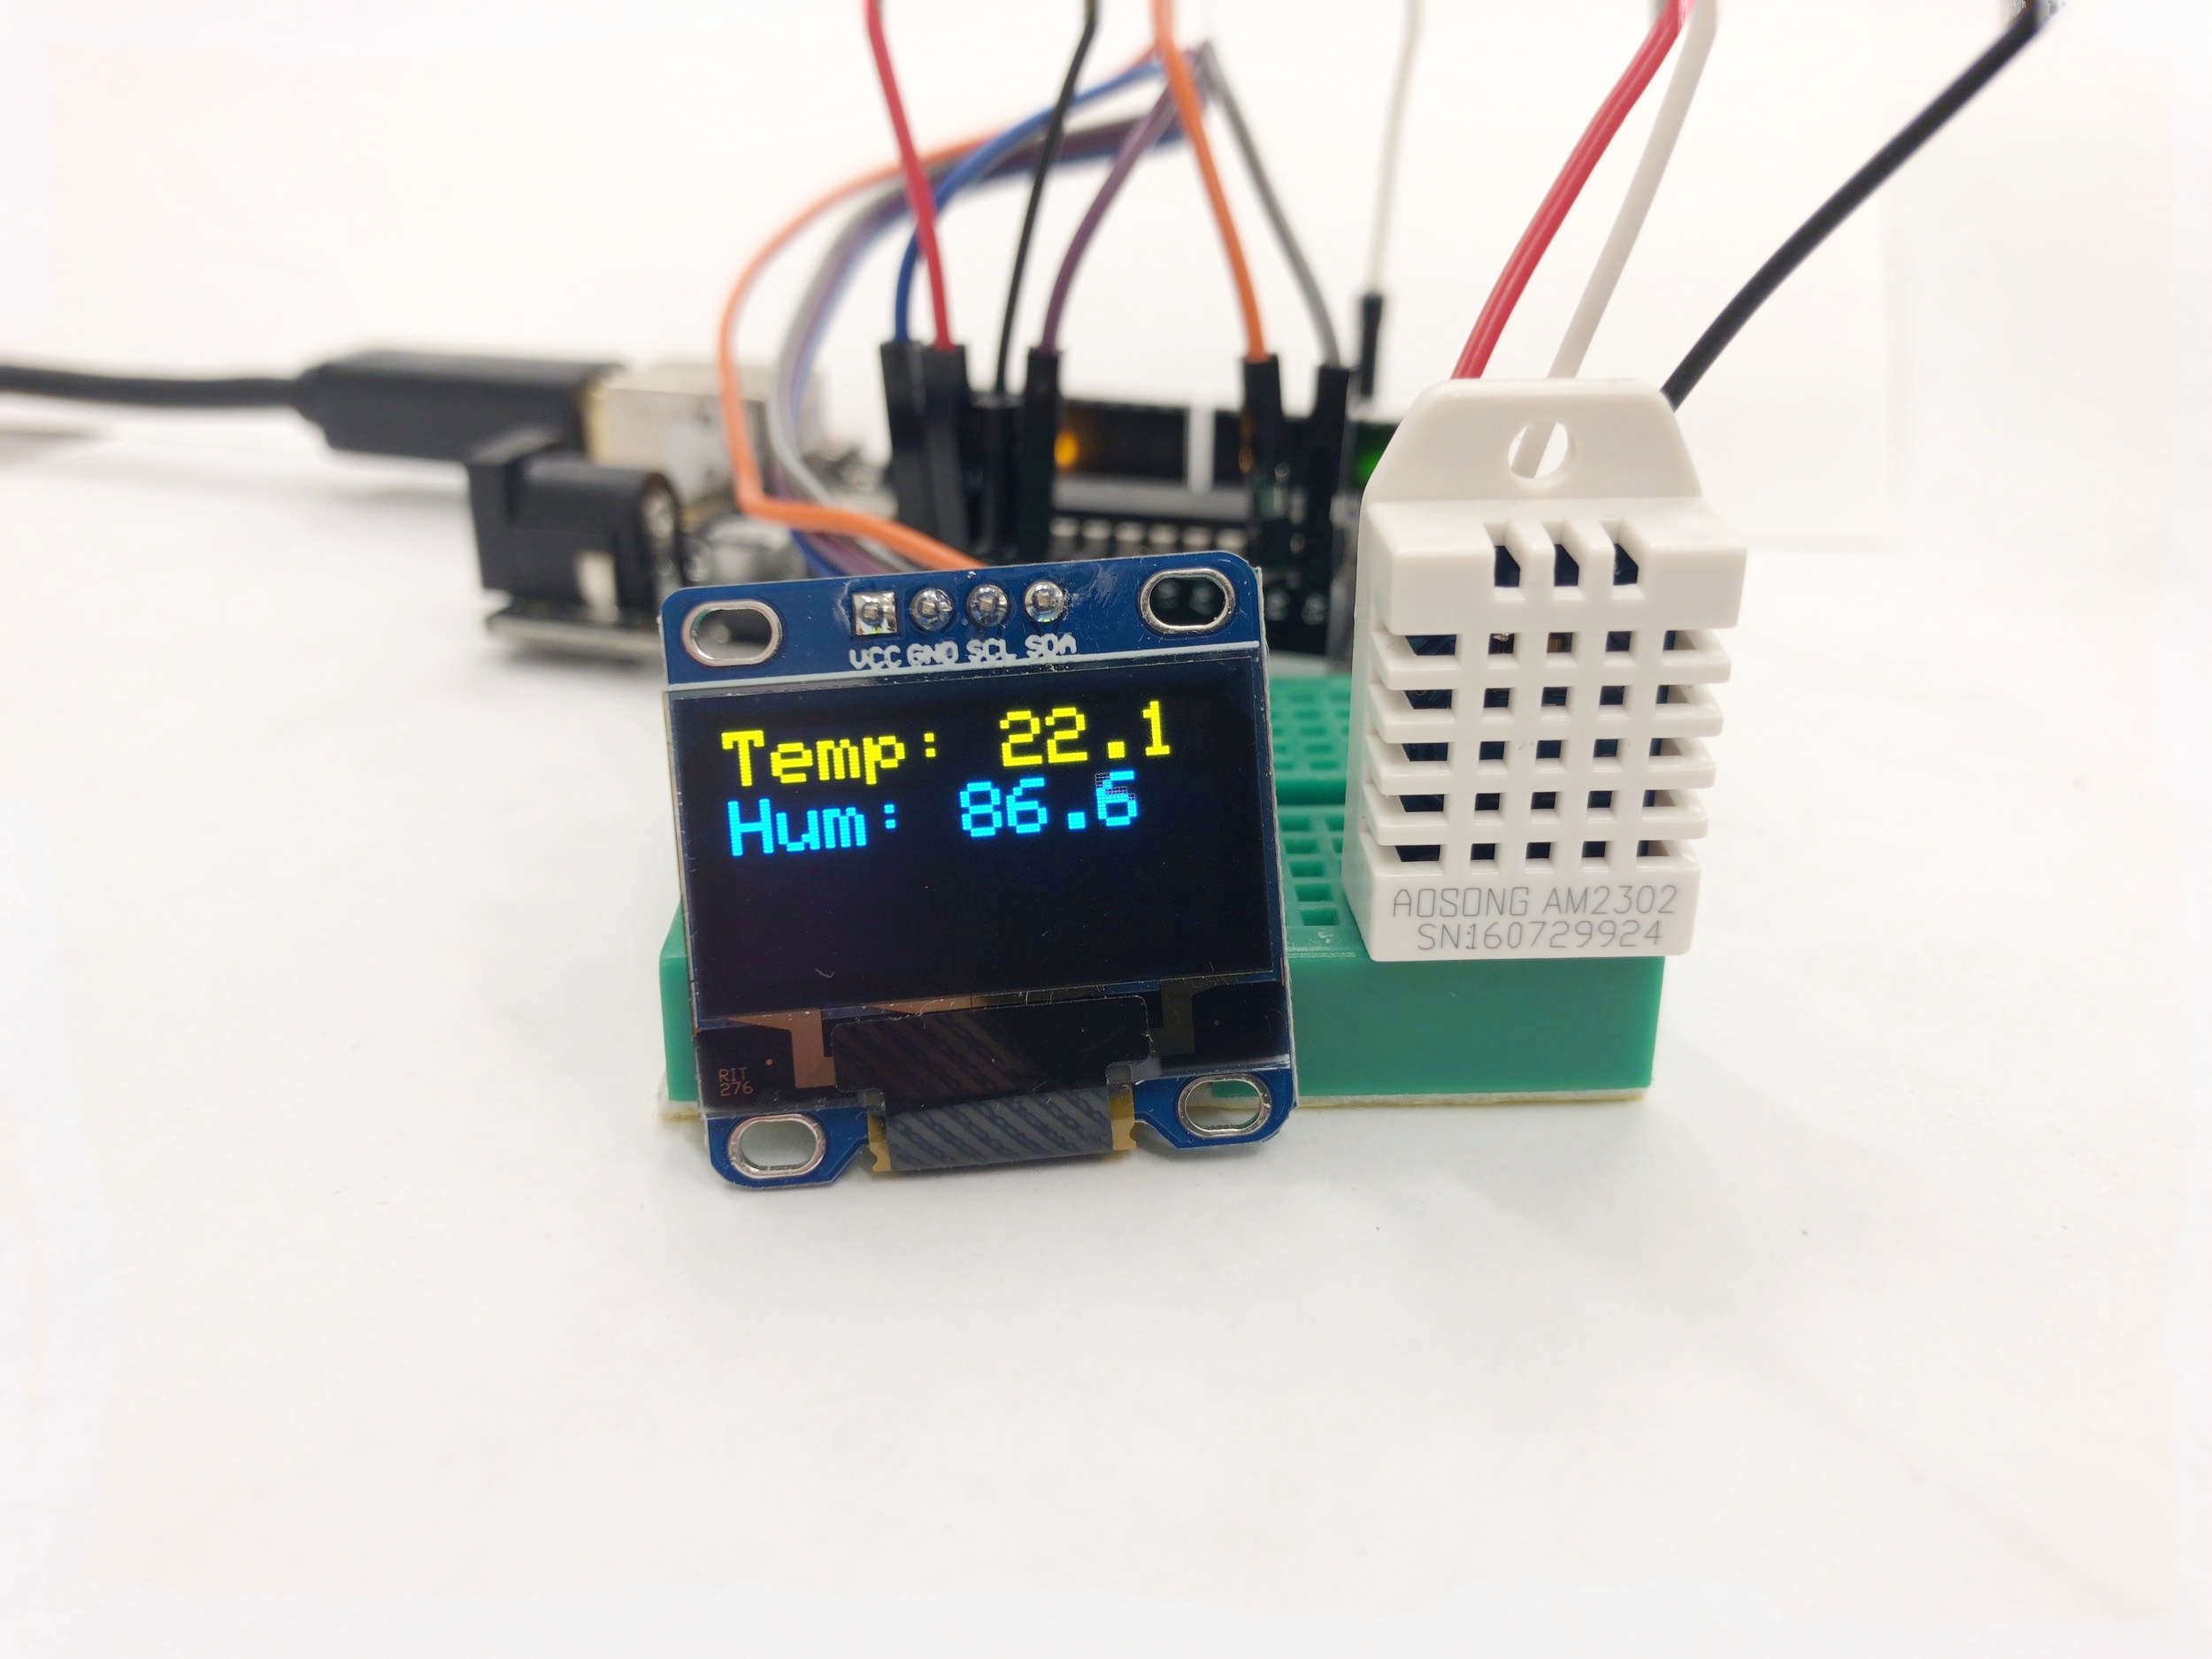
If the code and wiring is done correctly, the output should look something like the photo shown here. The temperature default display is in Centigrade, and the relative humidity display is given as a percentage.
This tutorial has demonstrated how to wire and display temperature and humidity onto an inexpensive, easy-to-use, organic LED display that is compatible with the Arduino platform. This type of display is great for small projects where the user may be interested in displaying results in real-time or having a small display for an embedded project. These OLED displays are great because they consume less power and are brighter than traditional LCDs. This tiny display is ready and capable of being inserted into a 3-D printed case and used as a miniature screen for any engineer's project.
See More in Arduino and Electronics:


