Internet of Things WiFi and Bluetooth Mesh Network with Particle Argon and Xenon Boards
The Particle Mesh Series is a collection of Internet of Things (IoT) boards meant for full cloud integration using WiFi and Bluetooth. The Particle mesh boards are called Argon (WiFi + Bluetooth gateway), Xenon (Bluetooth node), and Boron (LTE + Bluetooth node). These three boards were created to lower the cost of IoT solutions while also creating scalable projects in connected sensors and devices. This means the world of IoT has never been cheaper or more accessible. Particle boards run from $15 to $50 per board, depending on the mesh type (WiFi, BLE, LTE). Typically, you need at least one WiFi device (Argon, $25) and a few BLE peripheral boards ($15), making it possible to create a multi-node mesh network with up to 6 nodes for about $100!
In the tutorial, I will cover the simplest integrated IoT mesh, where I use an Argon board (WiFi + BLE) that is wired to an HC-SR04 ultrasonic rangefinder to register a ‘trip’ in the beam. The ‘trip’ in the beam is then communicated to the mesh network and notifies a Xenon peripheral (BLE), which subsequently turns on an LED. The BLE peripheral is constantly listening for notifications, and when the beam of the HC-SR04 is tripped, the state change of the Argon board notifies the mesh network and the Xenon registers the change, subsequently changing the LED to “on.”
Parts List for Project
All parts used in this tutorial can be purchased from Particle’s website, however, I will only be using the two boards: Argon and Xenon. I will be using a regular HC-SR04 ultrasonic board that I already had in my lab, as well as LEDs, resistors, and other parts used. However, the user can use the same process in this tutorial to replicate the same functionality using just parts purchased on Particle’s website.

NOTE: I will not be using the HC-SR04 ultrasonic sensor from the Particle website, instead I will be using the standard HC-SR04, 4-pin sensor.
The Particle boards do not supply 5V, so we must use a step-up converter to go from the 3.3V logic to nearly 5V. In my case, I’m using a 3.7V to 5V converter, which works for the HC-SR04.
Process Flow for Mesh Network

Wiring and Coding
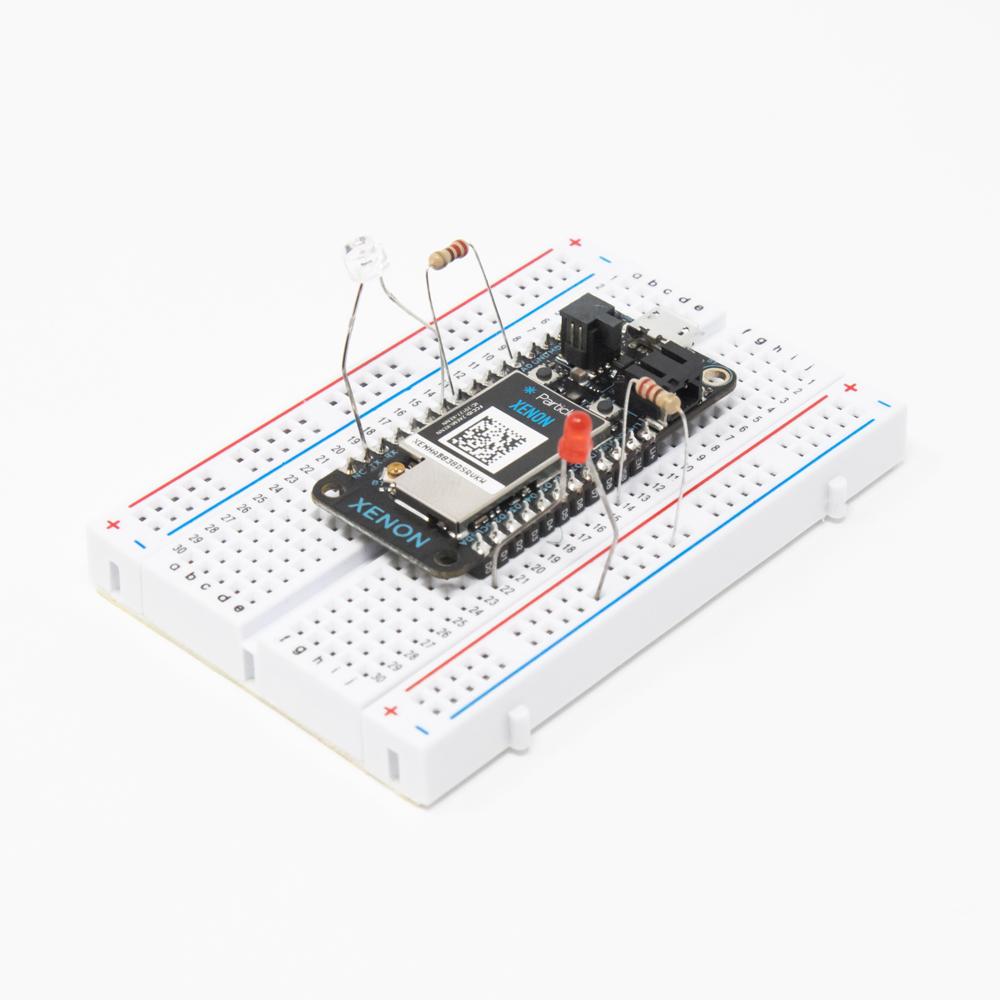
Following the process flow outlined above, the Particle boards will be wired just as a regular Arduino board. The coding is also very similar, as the C++ methods and basics are the foundation of the coding involved in programming the Particle boards. below are the wiring diagrams and code snippets for this project, first for the Argon board (WiFi + BLE), then the Xenon peripheral board (BLE):

All coding should be done at: https://build.particle.io/build/. Once on the build page, be sure to copy and paste the code below for each board. Then select the device to be flashed, and flash the corresponding code to the correct board.
// Sensor gateway using the Argon board. This contains the HC-SR04
// Ultrasonic code and sends data to the other nodes to notify of a trip

#include "HC_SR04.h"

double cm = 0.0;
bool beam_status = false;

int trigPin = D4;
int echoPin = D5;

HC_SR04 rangefinder = HC_SR04(trigPin, echoPin);

void setup()
{
    Spark.variable("cm", &cm, DOUBLE);
}

void loop()
{
    cm = rangefinder.getDistanceCM();
    if (cm<30){
        if (beam_status==false){

            Particle.publish("tripStatus", "breach");
            beam_status = true;
        }
    } else {
        if (beam_status==false){

        } else {
            Particle.publish("tripStatus", "all_clear");
            beam_status = false;
        }
    }
    delay(100);
}

// Subscribe to sensor tripping using the node (Xenon) board.

int led_pin = A0;

// We start with the setup function.

void setup() {
  // This part is mostly the same:
  pinMode(led_pin,OUTPUT);
  // Here we are going to subscribe to your buddy's event using Particle.subscribe
  Particle.subscribe("tripStatus", myHandler); // the name of the publish() call in sensor node [ publish("tripStatus") ]

}


void loop() {

}


// Now for the myHandler function, which is called when the cloud tells us that our sensor's event has been published.
void myHandler(const char *event, const char *data)
{

  if (strcmp(data,"breach")==0) {
    // if the sensor's threshold is breached, then turn your LED on
    digitalWrite(led_pin,HIGH);
  }
  else if (strcmp(data,"all_clear")==0) {
    // if your sensor's beam is all clear, turn your board LED off
    digitalWrite(led_pin,LOW);
  }
}
Usage, Performance, and Troubleshooting
Now that the process is understood and the boards have been wired and coded, it is time to test whether the system is communicating and responding correctly. In the central code (Argon board), we have set the threshold value to 30 centimeters - which means that when an object is within 30 cm of the ultrasonic sensor, the central board will send information to the system that the threshold has been breached. This will notify the peripheral board (Xenon), which will subsequently turn its LED on. A video below demonstrates this functionality and process:
The Particle boards should also be printing out event data to the Particle Web Console [find yours, here]. If you don’t see a window with event data similar to the one below, then something is wrong:
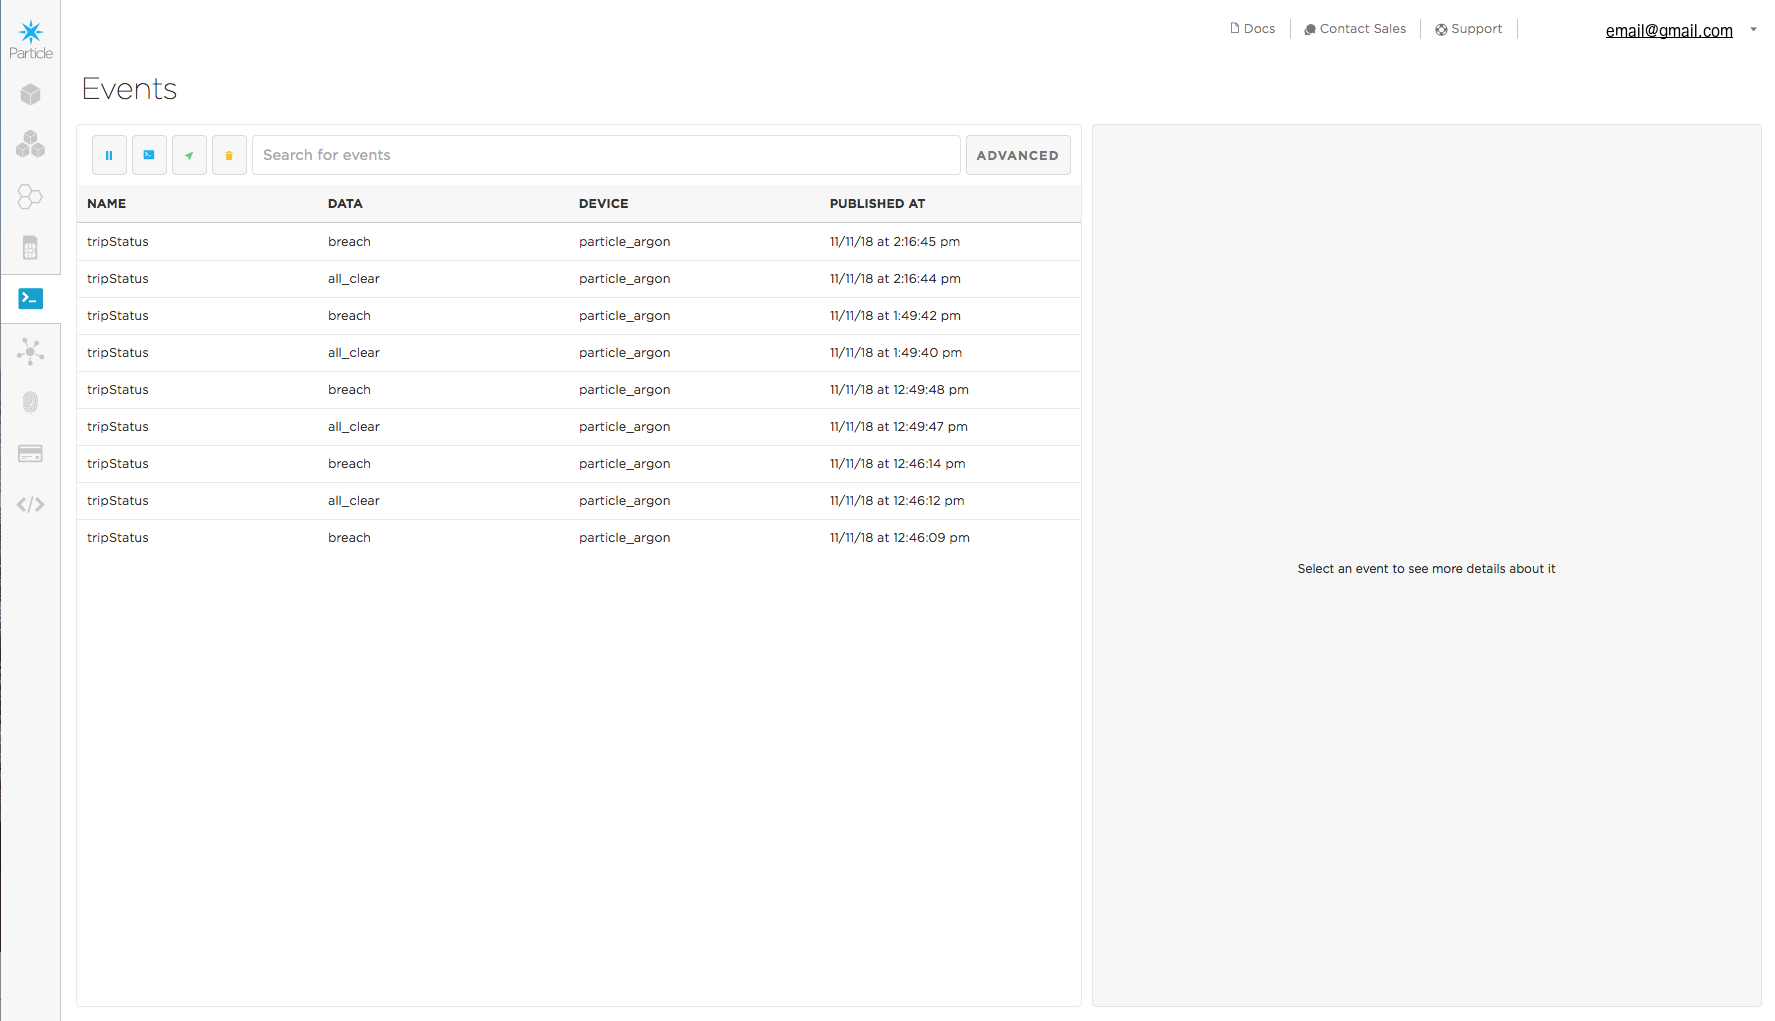
Event printout from this tutorial. The user should be seeing similar results if the wiring, programming, and setup are done correctly.
If you’re still not seeing any data populating the event console above, reverify that the correct code has been uploaded to each board at: https://build.particle.io/build/.
Verify that the Argon board has been selected and that the correct code has been uploaded, similar to the screenshot below:

Also, verify that the Xenon board is flashed similar to the screenshot below:

Conclusion

Particle has emerged as a leader in affordable IoT solutions with impressive integration and compatibility. And now with its Mesh Collection, it has delved deeper into the world of affordable options in connected devices. In this tutorial I demonstrated the power and simplicity of the mesh network by connecting two devices to a common “event,” which we called “tripStatus.” This event was controlled by an ultrasonic sensor and Argon board, which, when tripped at its threshold value, sends a notification to the event handler. The peripheral board subsequently reads this tripping and brightens its LED, notifying the user of an object within the specified range of the sensor. This is a simple demonstration of an IoT security system, and gives users great potential to create multi-node systems based on Particles simple and integrated design.
See More in Particle and Electronics: